Monday, April 25, 2011

Simplicty 2178: Plans for a Cynthia Rowley Dress in Chambray

My dear husband is out of town for work for a few days so my sewing machine is sitting idle while I chase kids and try to hold down the fort as a temporarily-single parent.  However, I do have an exciting new project in the works and here it is... Simplicity 2178.


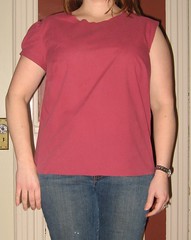
I am planning to make view D, the yellow-ish dress.  I am going to make it up in a blue chambray fabric from the Lissett fabric line sold at Joann's.  Here is the swatch:
                                                                                                                                   

As I said I won't get to my sewing machine with this project for the next couple of days but I do hope to make some progress in the evening after my little ones are in bed.  My goals are to measure the tissue, trace off my size (likely the 12) and make any pattern alterations I think are necessary.  I'll need an FBA and I'll probably shortening the straps.  I'll probably muslin at least the bodice and the waist pieces especially since my first look at the pattern indicates that this one has less ease than the average Simplicty pattern.  Is that the case with all of the Cynthia Rowley patterns?  This is my first one so I'm not sure.  Any spring/summer dress sewing going on at your house?

ETA:  Holy Macaroni!  Have you read any reviews for Simplicity 2178?  I just read 2 of them and well, its scary.  You can read them and be frightened too here and here.  I'm going to press on with my plan to try this dress because it is just so cute but I won't be able to say that I haven't been warned. 

Friday, April 22, 2011

Leila and Ben: Bolero Jacket for Baby Girl

My latest sewing project is a bolero jacket for my daughter using a pdf pattern from Leila and Ben


I have had this pdf pattern printed, taped together and cut out, just sitting in the cabinet with my fabric stash for about a month now.  I couldn't decide what fabrics to use for the jacket - I was thinking a navy pinwale cord but that seemed so blah and not springy at all.  But then my husband decided to throw out an old pair of his jeans and I realized that those holey jeans might be just the thing I have been waiting for.  So I made up my daughter's jacket in reclaimed denim from the worn out jeans with a lining made from Liberty tana lawn. 

The Liberty print I love so much that it was hard to convince my hand to actually make the scissors cut it!  But really it turned out to be the perfect lining for this little jacket - I think it transforms a plain old jean jacket into something special. 

Because I was using pieces from my husbands jeans I wasn't able to cut any of the outer pieces on the fold as instructed - so there are 2 seems on each sleeve instead of just 1 and there is also a center back seem that the pattern doesn't call for. 

This was my first time using these set snaps - in the past I've always used buttons or sew-on snaps.  I like the look of the snaps with this jacket and I feel like the snap closure will be easy to get on and off a squirmy little girl. 

Here is an action shot of my baby girl trying on her new jacket...


It was really fun to sew up this little jacket.  It comes together in a flash with no hand sewing involved.  I love the style and versatility of this jacket - she can wear it over a long sleeve shirt now while it is still chilly.  She can also layer it over a t-shirt or sun dress later on in the season.    If you are thinking of making up this pattern I have a couple of tips:
1.  Note that all of the seam allowances in this pattern are 1/4 inch.  I'm used to seeing 5/8 or 1/2 inch in garment patterns so I had to keep reminding myself to use a 1/4 inch seam.
2.  Although the pattern does not call for it, consider interfacing the areas where you will apply button or snap closures.  I used a 1 inch strip of medium weight fusible interfacing at the edges of the front lining pieces, fusing it just inside the seam allowance.
3.  The pattern pieces don't have any notches.  For the most part this is fine since you aren't working with gathers or easing in fullnes.  However I think a notch at the center back neckline and on the center back of the collar piece would help to make sure you get the collar on correctly.  You can easily put in a notch yourself if you want when you are cutting your fabric. 


All that aside I'm very pleased with the way this jacket turned out and I'm ready for the next project.  I actually have a little over a yard left of this Liberty print.  Maybe a matching twirly skirt for her?  Maybe a new spring top for me?  Decisions, decisions...

Sunday, April 17, 2011

Simplicity 2211: Market Blouse Finished!

It's finished!  My Market blouse in black cotton lawn, with mother of pearl buttons and hand sewn top stitch details in silk embroidery thread. 


My finished blouse is a size 12 with a 1" FBA.  I used the size 14 armband pieces.  I also let out the side seams starting about 6 inches from the hem so that I had a bit more room at the bottom.  I opted not to do the top stitching as instructed and instead I did hand stitches along the yoke and the button placket with hand dyed silk embroidery threat for a little textural interest.  Some of my stitches are a bit wonky but I think the overall effect is good.  Just something different to break up all the black blouse.  The buttons I've had in my stash for a while. 


Overall I like how this shirt came out and I would consider making up this pattern again - either in the tunic or dress lengths.   I am a bit cautious though because I feel like the styles in the Lisette line might be best suited to a more lean and willowy body type and I'm more of an hour-glass myself.  This may be just my preference for myself because I've seen beautiful garments on the Lisette flickr site on ladies of all different shapes.  But the neat construction with this garment makes me want to pull out my other Lisette patterns (since I have all 4 of them) and see how they would come together. 
You also get a skirt pattern with Simplicity 2211 and the construction uses a waist stay!  This seems noteworthy to me because a waist stay is something  I usually associate with a higher-end garment and more complex construction techniques.  I don't recall ever seeing a waist stay in a Simplicity skirt pattern so I attribute this nice feature to Leisl Gibson, the pattern designer. 

My next garment sewing project is probably going to be a spring/summer dress but I'm not 100% sure.  What are you sewing up now?

Thursday, April 14, 2011

Simplicity 2211: Market Blouse, Muslins, Take 3

Ok, so I'm making some good progress on the market blouse muslins.  Here is the size 12 muslin - this muslin was made with a 1" full bust adjustment.  I also released the side seams - beginning 6 inches from the hem where the seam is 5/8" I tapered to 1/4"  at the hem which made a huge difference in the gathering I was getting at the small of my back. 

If this pattern were a more fitted shirt I'd try to make some additional alterations however, the design is for a loose fitting pull over style.  I think if I went for a closer fit than what I have with this muslin I'd just be straying from the design which I don't really want to do for this.  So, I've already got my fashion fabric all prep-ed and I'm ready to sew!  I have decided to use self fabric instead of actual interfacing for the neck band pieces.  Hopefully, my next post will have pictures of the actual blouse - whether complete or in progress, I can't be sure!  ;)

Saturday, April 9, 2011

Dresden Plate Project, Part 3

We have overnight visitors this weekend so I've had to put my sewing machine away and clear off my sewing space so that it can be used as the actual dining room table.  Humf.  So my work on the Market blouse has had to be postponed for a day or two.  Hopefully I'll get back to it tomorrow.  In the interim I'm making due with a little hand sewing here and there.  Today I was able to put the last few stitches in the binding on my latest dresden plate wall hanging...


This one is a little different than my first two.  I took more creative license with this one and just went with the colors and embelishments that made me happy rather than worrying about whether it would match anything in my house or what a quilted wall hanging should or should not have, etc.  I think it is my favorite dresden plate so far.  I used fabrics from AMH's Innocent Crush line.  The background and center circle are done in wool felt and then I went back to the AMH fabrics to make a yo-yo to go over the wool at the center circle.  Then I added a scrap of wool felt to the center of the yo-yo.  I don't like to see the back side of the fabric in the center of a yo-yo.  I used cotton embroidery floss for the quilting and embroidery. 
I invested in this little quilting notion to make my dresden plates just a little easier.  I really like it so far.  (I realize it is hard to see in the picture so forgive my limited photographic skills.) 

And, I have these two blocks all sandwiched and ready to go next, also using fabrics from the Innocent Crush line.
Are you sick of seeing my dresden plates yet?  I hope not because I have a feeling these won't be my last.

Monday, April 4, 2011

Simplicity 2211: Muslin Take 2!

Well, thanks to some great advice from the commenters on this blog and to my posts at PatternReview and SewLisette I think I'm making progress.  I narrowed the shoulder by 1/2 an inch.  I took up an inch in length above the waist. 


Why hello sway back - I didn't even know you were there until today! I think the fit on this is pretty good at this point but I'm going to take commenter Carol's advice and release the side seams at the bottom and let the back hang.  I think I just need some width in the back along the hem to get the shirt to lay nicely. 
I've also got an old sheet all picked out with which to muslin this shirt again.  This time I'll try the size 12 with an FBA.  (My high bust is a 34 and my full bust is a 38.) Then and ONLY THEN, dear readers, will I know for sure which size is better for me, the 12 or the 14.  ;) 

Simplicity 2211: Muslin of the Lisette Market Blouse

For a while I've been searching for a simple, black, short sleeved blouse to wear this spring and summer.  Something that I could dress up for work or dress down for the weekends.  Something to replace just a regular crew neck t-shirt.  Should be no problem right, that's only the holy grail of tops!  I decided to give it a try with some black cotton lawn and view E of Simplicity 2211 from the Lisette line designed by Liesl Gibson of Oliver + S fame. 
I studied the back of the pattern envelope for a long time trying to decide what size to cut.  Then after I finished studying the envelope I studied the pattern tissue a while longer.  As most home sewists are aware, Simplicity patterns have quite a bit of ease in them.  Usually there is about 5 1/2" of ease in the bust and this pattern is no different. 
I wanted my shirt to be fitted but not so fitted that I couldn't load groceries, push a stroller or sit on the floor at story hour without popping a seam.  I usually make alterations to the pattern tissue right away - I do a 1" FBA for most garments and I always take out an inch of length at the waist.  But I've changed shape quite a bit in the last month since I stopped nursing my daughter so I wasn't sure which alterations I would need.  Also, Simplicity didn't include a finished length or waist measurement for the blouse so even though I measured the flat pattern I just wasn't 100% sure what to expect.  I decided that the safest bet would be to just cut a straight 14 and make a muslin without any pattern alterations.  Here it is:


The fit through the bust has the amount of ease that I was looking for however the darts are a little too low.  The rest of the shirt kind of looks like a sack on me.  It looks boxy from the front and bags around the lower back.  The waist is too low (surprise, surprise!).  The arm hole fits but the shoulder looks slouchy.  I think the slouchy shoulder is from the neckline pulling over to one side.  I feel that if I had 2 sleeves on and the neckline facing piece this might be corrected.  Overall, I think this muslin needs the following:
1. An inch in length taken out above the waist
2. A 1/2 inch in length taken out above the bust line (then I'd need to correct the armsyth to account for the length alteration above the bust)
3.  The side seams to be taken in, about 1/2 inch at the hem and tapering to nothing at the dart.
4.  Maybe, the shoulder narrowed by 1/4 to a 1/2 inch to correct for the slouchy factor. 

That is alot of alterations!  I think maybe I should start again and muslin a size 12 with a full bust alteration instead.  But I can't decide!!!  Should I start tinkering with this muslin or try again with a size 12?  Is there something I'm missing that might get me a better fit?  What do you think?

Saturday, April 2, 2011

Simplicty 2413: Project Runway Skirts

I sewed a spring skirt using Simplicity 2413.  This is view B which is a full A-line skirt with pleats in the front and back, on seam pockets and side zip.


The cotton print I used had a white ground and it was a little sheer so I added a lining to this skirt.  I made my version of view B without the wide band at the hem and I used the pattern piece for the wider waistband instead of the bias trimmed waist band.  Even though I left the hem band off I still had to take 5 inches off of the length of the skirt in order to get it to be the length shown above!  That is alot of hemming even for me.  Overall, I'm happy with this skirt.  I love the big roses and pops of yellow.  I like the retro-vibe that the skirt has and of course I love the pockets.  I'm sure I'll wear it to work a bunch once the snow finally melts. 

Here is my problem with Simplicity patterns - They do not list the measurement for the waist of the finished garment on the pattern envelope!  Only the length of the finished garment is listed on the envelope for this pattern.  Dear people of Simplicity, how is the home sewer supposed to figure out what size to make if she knows her own waist measurement but not the waist measurement for the finished garment??!!  How am I supposed to know how much ease the pattern has at the waist?  I have to get the pattern out and measure the tissue, that's how, and it is no fun!!!  But it is necessary for a skirt like this that is high waisted and full through the hips and thighs.  The waist is the critical measurement.  So, if anyone is thinking about making this up in a size 12 note that the finished waist measurement is about 29 inches.  I hope that I can save another sewer some time and frustration.  Happy sewing everyone!